The KML upload functionality provides users with a simple and convenient tool to upload their KML files generated in other software such as Google Earth in lieu of manually drawing the site data in the user interface. Note that currently KMZ files may not be directly uploaded to the platform. However, these files may be easily converted to KML format within Google Earth or other applications.
General Rules
1- Acceptable Feature Types:
(3) types of features may be uploaded to the platform:
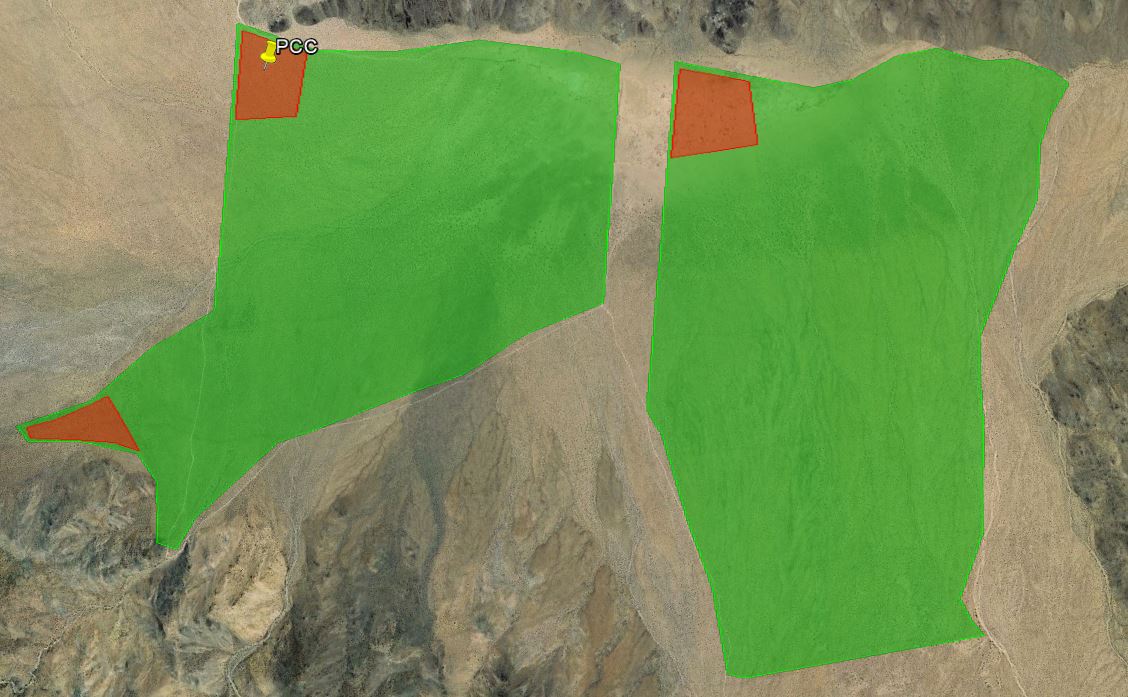
- Site Boundaries: These features define the boundaries of the parcel(s) of land being considered for the project. Site Boundaries must be drawn as POLYGON feature layers in the KML file. Multiple site boundaries may be placed in one project noting that each individual boundary must be created as a separate polygon layer in the KML file. Typically, the area defined under site boundaries would not include setbacks, as setbacks may be defined separately under the Boundaries tab. In some rare instances, for example when site setbacks vary across the site, we recommend users to upload the setback (buildable) area as site boundaries and assign a setback value of 0 ft under the Boundaries tab.
- Exclusion Zones: Exclusion zones are areas where the user doesn’t want the layout optimizer to place panels on. Examples include substation area, roads, and environmentally protected zones. Site Exclusions must be drawn as POLYGON feature layers in the KML file. Multiple exclusion zones may be placed in one project noting that each individual exclusion must be created as a separate polygon layer in the KML file.
- Point of Common Coupling (PCC): Point of Common Coupling is the point at which generator facilities connect to electric service provider (utility) facilities. This point is constrained to within the site boundary and is typically the location of the PV system interconnection switchgear (MV interconnection) or interconnection substation (HV interconnection). Note that the point of delivery in which electric power is delivered to the electric service provider (utility) may or may not be coincident with the point of common coupling. Additional user inputs to define the point of delivery are available on the Electrical Input page. The Point of Common Coupling must be drawn as a PLACEMARK feature layer in the KML file. There can only be ONE Point of Common Coupling per project.
Note: Only polygon type layers may be designated as Site Boundaries and Site Exclusions. Other features such as paths and placemarks are not allowed to be assigned to these feature should not be used to define site boundaries/site exclusions. When importing from GIS software such as ArcGIS, the generated KML/KMZ file should be investigated to ensure that the site boundaries/site exclusions show up as polygon features in Google Earth, and not as placemarks.
2- Feature Layer Naming Convention:
A specific naming convention must be applied to all the layers within the Google Earth or other KML generation software in order for the HST platform to recognize the associated features:
- Site Boundaries: In the KML file, all layers pertaining to site boundaries shall all be named “Site Boundaries”.
- Exclusion Zones: All layers pertaining to exclusion zones shall be named “Site Exclusions”.
- Point of Common Coupling: The layer pertaining to the Point of Common Coupling shall be named “PCC”.
3- Methods of Creating and Uploading KML Files:
Users may download the HST KML Template File, add their own feature layers to this template file, save it and upload it to the platform per the instructions below. Alternately, users may create or use their own existing KML files and upload that file to the platform while considering the general rules indicated above (see also instructions below).
Creating KML Files by Accessing and Modifying the HST KML Template File
To demonstrate a properly-setup KML file, a sample template file is available for downloading within the platform. To access the KML Template file, follow the following steps:
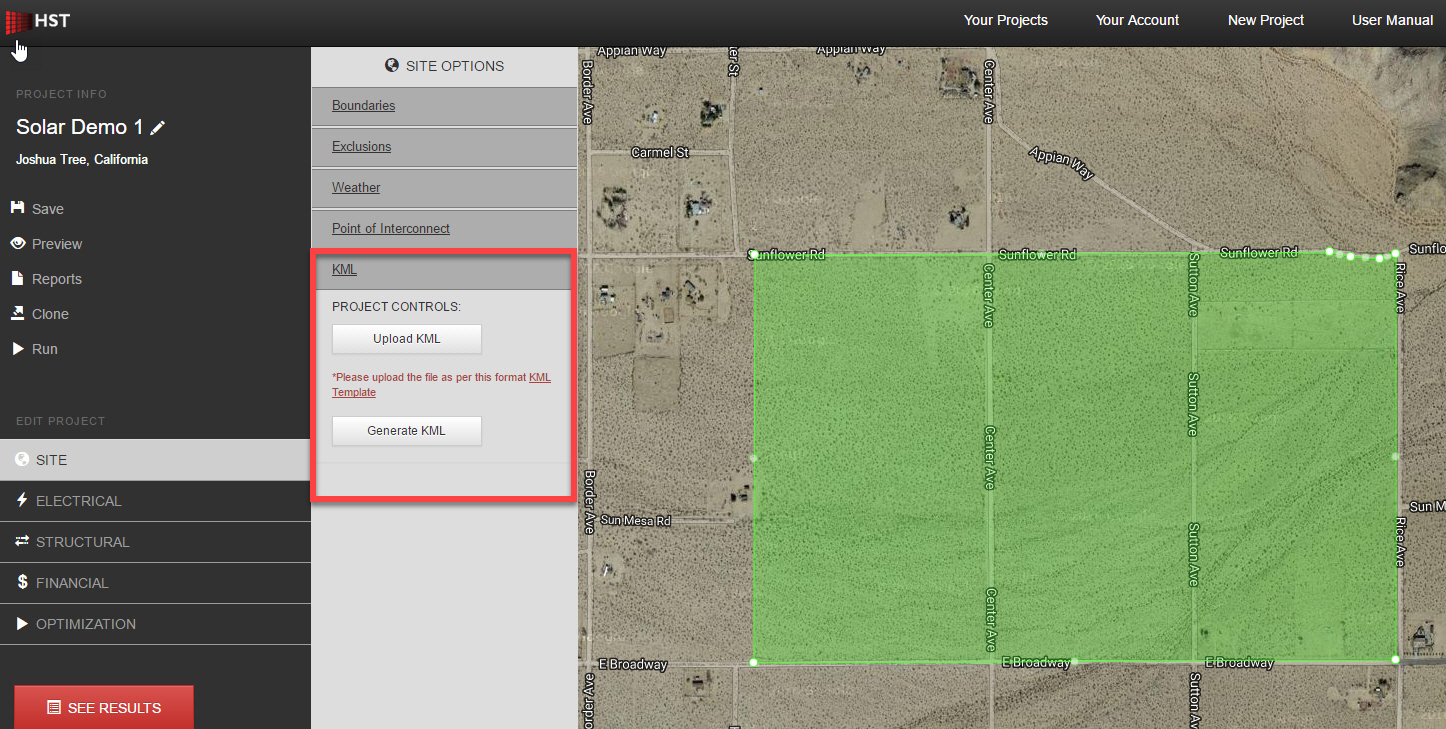
Step 1: Within the Project Design Environment, Click Site on the left Navigation Bar.
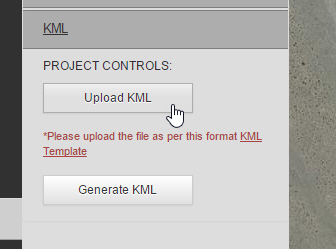
Step 2: Click KML within the Project Controls Widget.
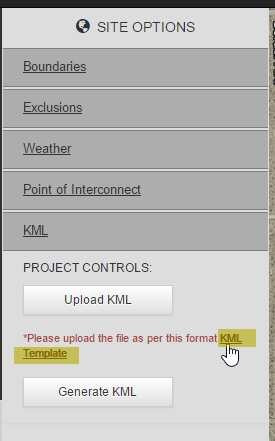
Step 3: Click the KML Template link and Download the KML template. The file is titled HST-KML-TEMPLATE.kml.
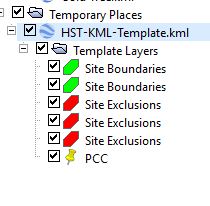
Step 4: Open the template file in Google Earth. Please see the feature layer naming convention in the graphic below. As stated above, each polygon feature layer may only contain ONE closed polygon.
Creating User-Defined KML Files
There are two methods by which users may create and upload their KML files to the HST platform:
1- By Using Existing KML Files
Users may simply use their existing KML files provided the general rules stated above, such as feature layer types and naming conventions have been incorporated into the subject KML files. Please note that Site Boundaries and Site Exclusions must only be defined as a Polygon feature layer types. Other feature types such as Paths and Placemarks should not be used to define Site Boundaries and Site Exclusions. When importing from GIS software such as ArcGIS, the generated KML/KMZ file should be investigated to ensure that the exported boundaries show up as polygon features in Google Earth, and not as Placemarks. Also, each closed boundary or polygon must be defined as a separate layer in order for the platform to recognize it.
2- By Starting with a Blank KML File
A blank KML file may be created and the associated layers considering the general rules stated above may be generated within the KML file.
Working With KML Files in Google Earth
There are two methods by which site geometry may be defined in Google Earth:
1. Drawing site boundaries, etc directly in the KML file:
- To draw Site Boundaries:
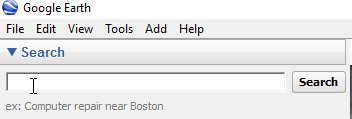
- Browse to the desired site location first by typing the address, etc in the Search box of Google Earth.

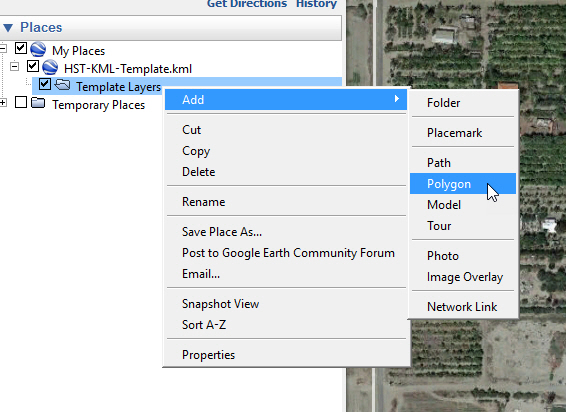
- Right-click on the Template Layers folder (or other folder name if user-defined file) and select add > Polygon

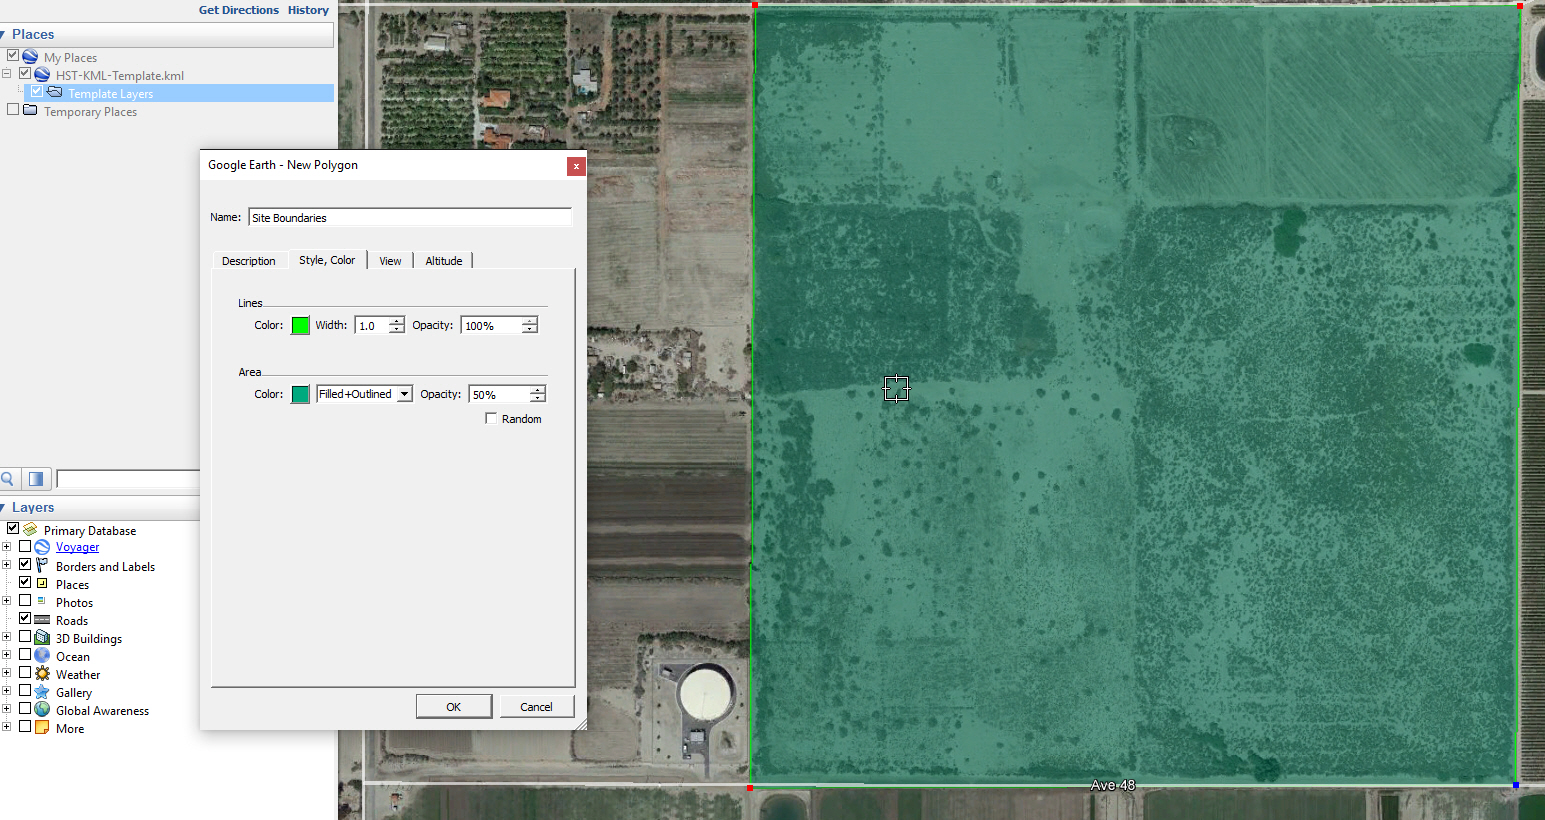
- In the New Polygon window that opens up, type in “Site Boundaries” as the layer name and start drawing the site boundaries. Note that the polygon styling may be modified by user. However, the KML Upload feature in the platform will revert to default platform colors.

- Once done, click OK in the New Polygon window to close it.
- To add more Site Boundaries, repeat the steps above. Site Boundary layers must all be named “Site Boundaries“.
- Please note that each Site Boundary layer may contain only one closed polygon. The UI will return an error when uploading an otherwise defined site.
- Browse to the desired site location first by typing the address, etc in the Search box of Google Earth.
- To draw Site Exclusions:
- Follow the same steps as above, except that the feature (layer) name shall be titled “Site Exclusions”.

- To add more Site Exclusions, repeat the steps above. Exclusion zone layers must all be titled “Site Exclusions“.
- Please note that each Site Exclusion layer may contain only one closed polygon. The UI will return an error when uploading an otherwise defined site.
- Follow the same steps as above, except that the feature (layer) name shall be titled “Site Exclusions”.
- To add the Point of Common Coupling:
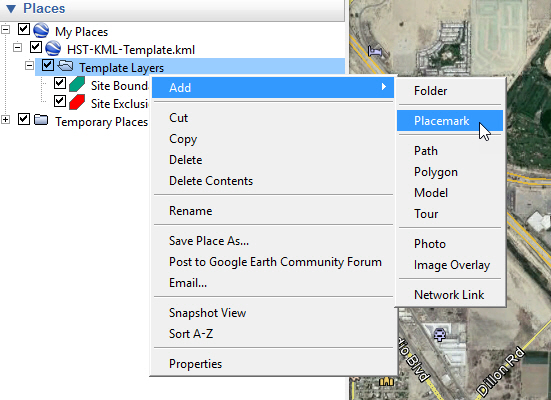
- Right-click on the Template Layers (or other folder name if user-defined file) folder and select add > Placemark

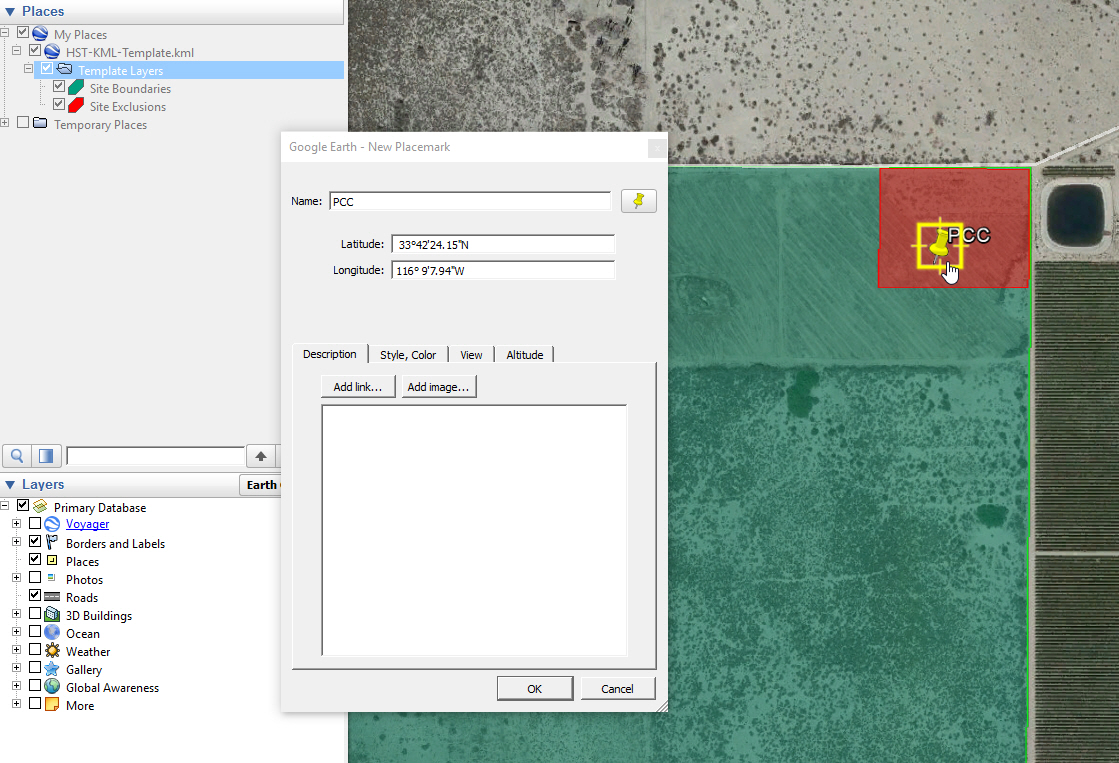
- In the New Polygon window that opens up, type in “PCC” as the layer name and drag the placemark icon to the desired substation area on-site.

- Once done, click OK in the New Placemark window to close it.
- Only ONE Point of Common Coupling may be defined per project.
- Right-click on the Template Layers (or other folder name if user-defined file) folder and select add > Placemark

2. Moving/Copying existing layers from other KML/KMZ files to the HST template file or other user-defined file:
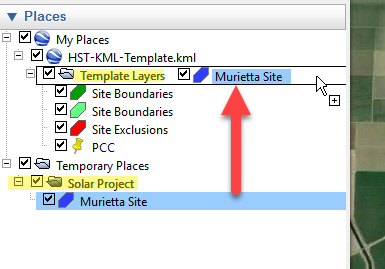
- To move/copy Site Boundary layers from other KML files:
- Simply drag and drop (or copy and paste) the desired polygon feature layer over the Template Layers folder (or other user-defined folder) under the HST-KML-Template file (or other user-defined file). A “+” sign will appear next to the pointer once it is placed in the correct position.
- Please note that each Site Boundary layer may contain only one closed polygon. The UI will return an error when uploading an otherwise defined site.

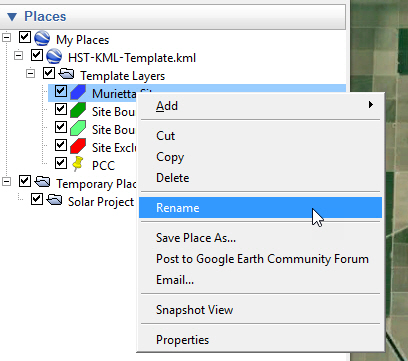
- Right-click the new layer that was just transferred/copied to the template and select Rename.

- Rename the layer to Site Boundaries and press enter.
- To add more Site Boundaries, repeat the steps above. The site boundary layers must all be titled “Site Boundaries“.
- To move/copy Site Exclusion layers from other KML files:
- Follow the instructions above for moving/copying Site Boundaries except that these layers must all be named Site Exclusions.
- To add more Site Exclusions, repeat the steps above. All of these layers must be titled “Site Exclusions“.
- Please note that each Site Exclusion layer may contain only one closed polygon. The UI will return an error when uploading an otherwise defined site.
- To move/copy the Point of Common Coupling layer from other KML files:
- Follow the instructions above for moving/copying Site Boundaries except that the layer must be renamed PCC.
- Please note that only placemark type layers may be designated as Point of Common Coupling. Other layer types such as paths, etc are not currently compatible with the HST user interface platform.
- Only ONE Point of Common Coupling may be defined for any given site.
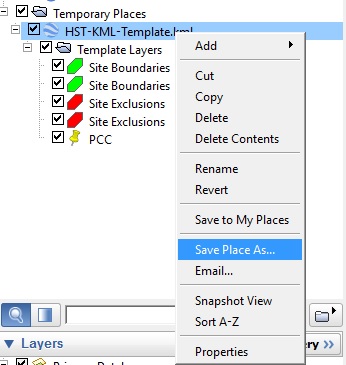
Saving KML Files in Google Earth:
Once the desired site has been generated, save the file by right-clicking on “HST-KML-Template.kml” (or other user-defined name) and selecting Save Place As…. In the window that opens, select KML under Save as type. It is important that the file be saved as KML type, and not KMZ. The file name may be modified as desired.

Uploading KML Files
After the desired KML file has been created and saved, go back to the KML tab within the Project Controls widget of the platform and click Upload KML. In the new window that opens, find the KML file that was saved to your hard drive, select it and click Open. If the file was created following the instructions above, the site window will re-focus on the uploaded project site and the workflow is complete.